An Update on My Totally Attainable Goals for 2013

10

Saturday, March 30, 2013

Way back in January I jumped on the resolution bandwagon and blasted my personal goals all over the internet. I must've been feeling brave that day. Or crazy. ;) 

I wrote a list of twenty challenges that I was hoping to accomplish over the course of the year. Here's how I'm doing so far.

P.S. No-one is as surprised as me that I'm actually following through with an update. Freaky, yes I know.
 
2013 Challenges
 
1. Take a family vacation.
 
Done! Our little fam went to Florida for two weeks in February. I heart palm trees and beach sand.
 
2. Learn Photoshop and/or Lightroom better by taking an online or in-person course or workshop.
 
Done! I took an in-person 4-week Photoshop workshop that was newly offered by my old photography instructor. Now I can make layers and clone backgrounds and all sorts of cool stuff!
 
3. Wear pink lipstick out of the house on a weekday.
 
Ummm, not yet but..... I did buy some. Now I just need to do the wearing part.
 
4. Choose a runner for the stairs already.
 
Okay so while I haven't completed this yet, I'm part way there. Before buying/installing a stair runner I had to repaint all the stair treads first which I just finished yesterday. Booya!
 
5. Teach the Coopster better sleep habits, ummm, like how to self-soothe. Apparently he likes to wake up every hour now to get cuddles.
 
Done! I mentioned in my last Coopster update that after some gradual and consistent sleep training he is now sleeping through the night. And it is glorious.
 
6. Eat at a sushi restaurant even though it makes me queasy just thinking about it. 
 
Ummm, not yet.
 
7. Order some fabric with color (gasp!) and make some new cushions for the living room.
 
I'm sort of on my way with this one! I have some fabrics narrowed down and will be ordering some swatches next week. Me: excited.
 
8. Go fishing. Of course I would let the fishies go.
 
Ummm, not yet.
 
9. Read ten books. From the library.    
 
I tried but failed at this one so far. We took a family trip to the library. I checked out eight books. I only got through half of one before I had to return them all. I put the stack in my car and forgot about them for two weeks. Then I got an angry voicemail from the library informing me of my late charges. Oy.
 
10. Knit one thing. Maybe a scarf. Maybe a baby scarf because they are smaller.
 
Ummm, not yet.
 
11. Give away 10 small gifts to unsuspecting peeps just for the fun of it.
 
Oh man, saying that I haven't done this one yet makes me sound really horrible. I do have some ideas though. Now it's time to follow through!
 
12. Help Alex finish the basement.
 
Ummm, not yet but..... I do go down there sometimes and tell him he's doing a good job.
 
13. Take Cooper for swimming lessons even though being in a bathing suit in front of strangers is kind of horrifying.
 
Ummm, not yet but..... I'm checking the schedule as soon as I finish this post. Bad mommy forgot about swimming lessons.
 
14. Get braces. Again. Yuck, blech, boooooooooo.
 
This one is going to take a lot more self-pep-talks.
 
15. Do a 1000 piece puzzle. Wow, I'm a nerd.
 
Ummm, not yet but.... maybe I'll ask for one for my birthday. Nerd alert. Nerd alert.
 
16. Make a (wannabe) real photography website. Eeek. That one is scary.
 
I'm working on this one but it's nowhere near being ready. Starting is always the hardest part of anything, right?
 
17. Do some family portrait sessions and charge a wee bit of money for them. Eeek! That one is super scary too.
 
Done! I haven't mentioned this yet but another reason why I didn't post much on the blog during the month of February was because I did six family photo sessions since January! I've been taking all of my photos in Raw and processing them all using Lightroom and Photoshop which takes quite a bit of time for a newbie like me. :)  
 
18. Cook a recipe from the Thai cookbook that I bought two years ago.
 
Ummm, not yet.
 
19. Bake some cinnamon buns.
 
Ummm, not yet but.... I dream about eating them quite often. ;)
 
20. Adopt a baby. Okay so this one doesn't really count because we've been trying to do this for the last four years. But maybe 2013 will be the year it goes down!
 
Ummm, not yet but....... as of the last update it looks like we are #55 or so on the waitlist (we started at #222).
 
------------------------------------------------------------------------------
 
The final report says that I've accomplished 4/10. If I keep going at this rate I just might be able to finish this list by the end of the year but probably not. Hahaha.
 
How are you doing with your New Year's resolutions and goals? Have you given up or are you still going strong?
 
:)

The Fixer Upper - The Exterior Siding Colour

16

Friday, March 29, 2013

We had to make the biggest decision ever yesterday..... siding for The Fixer Upper!
 
It was nerve-wracking. So much self-inflicted pressure to choose the right colour. ;)
 
One of our local roofing / siding companies was having an open house which meant their lowest prices of the season as well as a discount on regular stock siding. Even though it's a bit early to be thinking about replacing the siding at this time of year, we knew we wouldn't get a better deal than if we went now.
 
Alex and I have been driving around town analyzing siding colours for months. I'm sure it will come as no shock, especially after this post, that I'm alllllllll into the grey exteriors lately. I'd been going back and forth between a medium grey and a dark charcoal for weeks. I knew the medium grey would be the safest bet, but I thought the charcoal would be a real show-stopper and I finally decided to step out of my comfort zone and go for the darker colour.
 
'Cept as luck would have it the charcoal siding was special order and not on sale yesterday. The super helpful girl at the desk figured that if we ordered the special order charcoal colour we would end up paying an extra $60 per square.
 
Even though the non-practical voice in my head kept saying go for the extra-special special-order charcoal siding, the rational part of me (okay so it was Alex) decided to go with the regular stock. We keep having to tell ourselves that The Fixer Upper is a rental and not a flip therefore we can't justify spending outrageous amounts of money on renovations because we just won't get the money back.
 
So. Here were our colour choices:
 
 
Which one would you have picked? Our final choice ended up being the colour Harvard Slate.
 
 
Eeeep! I hope it's the right choice! I did some googling last night and was able to find one good photo of a house clad in Harvard Slate siding. Here it is:

Source: Unknown
I really hope the colour will look nice and crisp with all-white trim. Even though I'm nervous about how it will turn out, I'm sure that any new siding would look better than what's on there right now. In case you've forgotten here is the totally hurtsville exterior on The Fixer Upper:


Uhhh, yeah. Pretty nasty.

I can't wait for the day when all the mint green siding is gone and the new stuff starts going up. So exciting!

--------------------------------------------------------------------------------------

If you're new around here or can't remember how we came to buy another house, you can read the lengthy story below. :)

Easy Chalkboard Tags

30

Thursday, March 28, 2013


So this project was pretty simple. It still took me a week to do it but I'm pretty sure it's just because I like the look of craft clutter all over the house. 
 
Speaking of craft clutter I'm pretty much in love with my glue gun. Aaaaaand that was random.
 
So. I lugged a two-shelf bookcase into Cooper's bedroom a few weeks ago and found six baskets to fit inside. It was looking cute but plain. I thought some chalkboard tags on each basket would be a fun and easy little project to, you know, spice things up a little.
 
I hit up Michael's and found two packages of thin wooden rectangle things. (I was a bit of an eager beaver and started opening the package before I took a picture of it.)
 

They came in packs of four so I had two extras just in case I messed up. It has been awhile since I've used a power tool after all.
 
 
I used Alex's cordless drill to drill a hole in each corner of the wood.
 
 
Each hole was a half inch from either edge. 


Once I had four holes drilled in one piece of wood, I used it as a template for all of the other pieces.
 
 
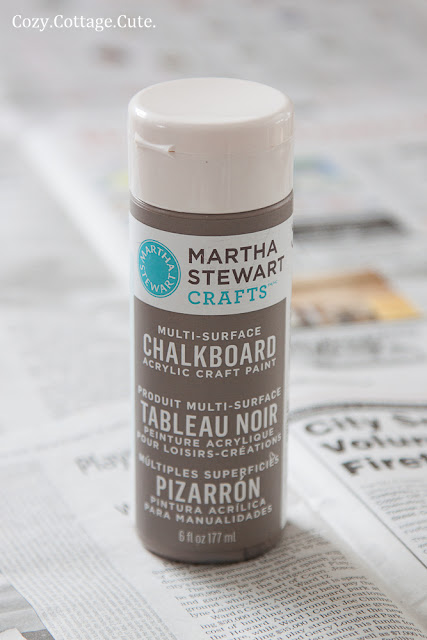
I thought it was pretty awesome when I found the section with chalkboard paint at Michael's and there were other colours besides black! Gotta love Martha.
 
They had some bright colours which would have been fun to use in a different room. However neutral-Jo (that's me) went with a medium grey to match the pewter and brushed nickel in Cooper's room.
 

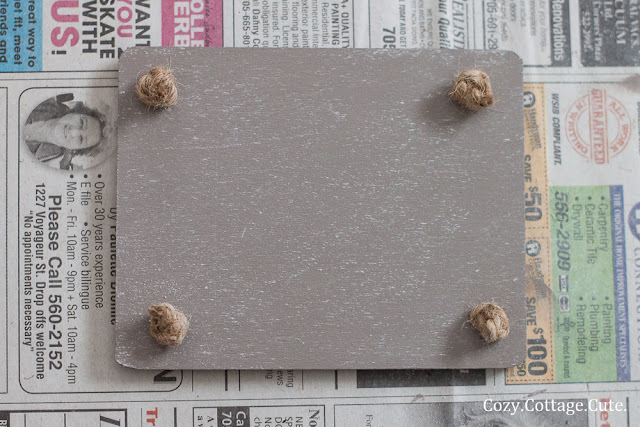
I painted three coats of the chalkboard paint right onto the wood. Primer? Who needs it when you're lazy like me. Once the three coats of paint dried (with the help of my hairdryer) I conditioned the wood all over with a piece of white chalk. Instead of wiping it completely clean, I left a bit of chalk residue behind. To make 'em look used or something.

 
Next, I pulled out my roll of jute twine. Love that stuff. You know I can't do a project without it, right?


I fed the twine through the back of the first hole and left enough so that I would be able to tie some knots.
 
 
I tied two knots on the first end.
 
 
Now, here is the tricky part. I originally wanted to feed the back of the twine through the wood and through the basket to adhere the tags but the spaces in between the basket weaves weren't big enough. So, I fed the back of the twine through another hole and tied it off with another two knots.
 

I did the same on the other side so that I had four knots at the front of my wooden tag.


Then I trimmed the twine.


Finally, I practiced my primary printing and wrote some labels on the tags!

 
I forgot to take pictures of the last step but I whipped out my trusty glue gun and glued the tags right onto each basket. All I needed was some thin strips on each length of twine at the back. The glue comes off pretty easily if I ever get tired of the tags and want to take them off. 


I was planning on getting a few more pictures however someone was finished pulling all the pajamas out of the bottom dresser drawer and came over to investigate. 


I guess he wasn't impressed that the baskets were empty. Heh heh heh. :)
 
Sharing Here:
 
The Creative Spark @ Clean and Scentsible, Blog Link Party @ Somewhat Simple, Hookin' Up With House of Hepworths @ House of Hepworths, Fabulously Creative Friday Link Party @ Jennifer Rizzo, Treasure Hunt Thursday @ From My Front Porch to Yours, Feathered Nest Friday @ French Country Cottage, Inspire My Please @ Liz Marie Blog, Frugal Friday @ The Shabby Nest

Coopaloops is 11 Months Old

32

Tuesday, March 26, 2013


I can't believe my little stinker just turned 11 months old. He is seriously growing way too fast.
 
It might be the fact that he eats sooooo muuuuuch foooooood. I'm telling you this kid has serious food issues. He shovels it in and can never seem to get enough. Just this morning he ate a whole oatmeal blueberry pancake, half of an avocado, and some cottage cheese. I had to stop him so that he would still be hungry for his milk! I'm still trying to give him lots of different flavours and textures. He'll pretty much eat anything (even pieces of raw mushroom, flakes of cooked salmon, etc.) but he definitely prefers some foods over others. For example, if he's eating a tiny piece of cucumber and I put some raspberries down, he'll spit out the cucumber to get to those berries asap. It's pretty funny. When he's full he does the cutest thing. He takes the leftovers and piece by piece places them on the seat beside him. When I lift him out of the highchair I occasionally find a little pile of uneaten food. Maybe he's saving it for later like a little chipmunk, heh heh heh.
 
Coops is finally sleeping through the night from about 6:30 p.m. until 6:30 a.m. It took a lot of hard work but we did it. I have absolutely no idea how I was even functioning before. Having my nights back is absolute awesomeness. He has two 30-40 minute naps during the day which is when I sprint around trying to get any projects or chores done.
 
His favourite toys right now are a big foam ball and an adorable set of tiny wooden cars (that aren't supposed to be for babies but don't worry he's always supervised when playing with them). I'm trying to figure out what kind of fun present to get him for his first birthday which is coming up soon. If you have any ideas I'd love to hear them!
 
He's cruising around the house holding onto furniture, walls, and pant legs. He can climb up stairs but I'm trying not to encourage that just yet. He loves pointing to new things and making the sound, "Oooooooh" or "Whooooooooa". Obviously I find that pretty adorable as well. ;)
 
I'm finding it next to impossible to get any good pictures of him looking at the camera. He's always too busy doing this stuff:


The rare occasions when I get him still enough to get a nice, crisp photo he is always making the goofiest faces!


P.S. He loves bopping around to music, especially that new Taylor Swift song.
 
P.S.S. He's got six teeth!
 
P.S.S.S. He tries to hijack my blog all the time. I'm sure it's to say hi to you. ;)


The Fixer Upper - Exterior Doors

11

Saturday, March 23, 2013

Wow, it's been a long time since I've shared any progress from The Fixer Upper. It doesn't mean that work hasn't been happening over there. It's just that most of the work has been "un-pretty" if you will. Here are a few examples off the top of my head although I'm sure this list can probably be more than tripled. Alex and his dad have been busy!

Un-Pretty Projects Over at The Fixer Upper:

- five new basement windows were purchased and installed
- all new ductwork was put in and hooked up to the furnace
- plumbing for a laundry tub in the basement was set up
- the bathtub in the second floor bathroom was framed in
- electrical plugs and lights were wired up in the basement
- the pool wall was reinforced so it didn't cave in over the winter 
- the basement stairs were reinforced because they were super creaky and rickety
- the main floor bathroom door had to be rehung after they leveled the back of the house
- the back part of the house was insulated
- a hole in the floor under the dishwasher was patched
 
 
One blog-worthy project that the boys did get done (yay!) was to install two new exterior doors. We were originally planning to salvage both of the original wood doors, however the one at the front of the house had too much wood gouged out of it from bad hardware installation and the back door stunk of pet urine. Since we got rid of every single surface at the back of the house for that very reason, it didn't really make sense to keep the last remaining stinky item. {Shudder.}
 
I basically have the best family and friends ever. Many of 'em read my blog and will regularly send me a message or phone-call if they see any needed items that I've mentioned on my blog. So, I got a call from my aunt a few months back saying that Home Depot had exterior doors in the style that I really liked for $197 per door. Except they were one of those one-weekend-only special buys.
 
We raced to Home Depot like nobody's business hoping to get a 32" door for the front and a 30" door for the side. Unfortunately the doors in the shipment were all 32" wide. We went back and forth over whether to buy just the front door, as we wanted both doors to be the same. In the end we couldn't pass up the deal and went ahead and purchased the front door. 
 
Well whaddayaknow the very next weekend, when Alex went to the window / door department to order the basement windows, he found another shipment of the same door. Except this shipment had the 30" door size! Since there were only three doors left, and Alex had firm instructions from me via text to not leave the store without the door, he had to call one of his buddies to pick it up in his truck since Alex was driving the car that day. Oh the things we'll do for a good deal cute door.


The old doors on The Fixer Upper were so ratty tatty that these new ones make the house look so much better already. It also helps that the boys ripped off some of the icky mint green siding.
 
Here is the front door:
 
 
And here is the side door:
 
 
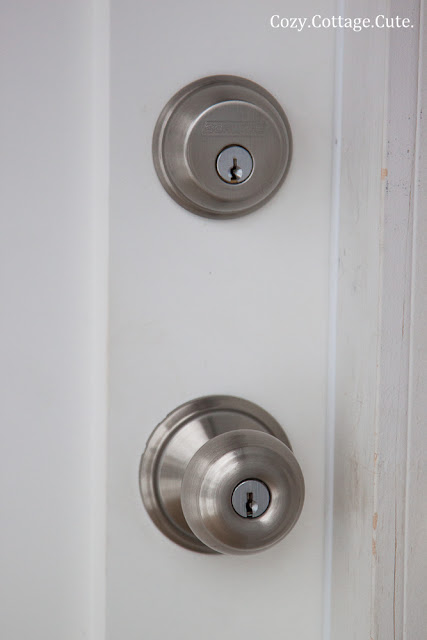
We scored a great deal on the front door hardware. The box had been opened (but was still brand new) so we got the set for 50% off! Just an FYI, both the front door hardware and the side door hardware are the same colour, satin nickel, although they look different in the following photos. 


Since the doors are only primed they will definitely have to be painted with some durable exterior paint. In a fun colour of course. I have some ideas twirling around but of course they will depend on the siding colour we choose.
 
P.S. We're going for the siding next week. Eeeeeep!

Bookcase N' Baskets

15

Friday, March 22, 2013

Since I'm pretty sure I have the squirmiest baby of all time, we ended up moving the dresser / change table out of Cooper's room a few months ago. I'm telling you..... he kept trying to jump off that thing!
 
Dresser / change table out.
 
 
To fill in the empty space where the change table used to be I moved in a little bookshelf that I had purchased a few years ago from Pottery Barn Kids. It's the Cameron 2-Shelf bookcase.
 
Since the room is so tiny I thought I would use the bookcase for some additional storage.
 
Hello, baskets!


I found six matching seagrass baskets at The Great Canadian Superstore. (I often say that I'm going for groceries but really I just browse the home décor section the whole time, heh heh heh.)


The bookcase / basket combo is pretty cute, but kinda boring. I thought I would dress the baskets up a little bit by making some labels for them. I picked up a few supplies at Michael's so stay tuned for a little tutorial sometime over the next few days. :)
 
P.S. I moved the dresser back down into it's old spot in the breakfast room. I kind of missed it in there. 
 
P.S.S. I deleted four of your lovely comments by accident. It wasn't my fault though. I was feeding the Coopster and playing with my phone at the same time. Then.... he pinched me where it really hurts. Too much information or what!?!?! Bahaha!


P.S.S.S. The wall above the bookshelf needs a little somethin' somethin' but I still haven't decided what yet!

(The Prettiest Ever) Dining Room Curtains

35

Tuesday, March 19, 2013

I hope you've forgiven me for my lameville one-picture-post yesterday. Like I said, I was a bit excited when I finally found curtains for our dining room that fit in with our light and white cottage style!


If you've been reading for awhile, you'll know that I've had a difficult time trying to find curtains that look good with the wooden valence over the window. I think that over the last few years I've purchased (and returned) more than ten different styles of curtains for that one window! As a matter of fact I had given up looking for curtain panels and had written a blog post about possibly using antique shutters to dress up the windows instead.
 
I'm glad I stuck with curtains because they really soften up the room. Check out the before and after picture to see what I mean!


The curtains are a soft, light grey fabric with the prettiest white flowers and leaves printed on top.
 

The store where I found the curtains also carried white on white curtains but I decided to live on the edge and go with the light grey. Heh heh heh.

 
I really love how they look from the kitchen. Well, minus the carbon monoxide detector and ladder balanced on a tea light. ;)


I purchased the curtain panels from a local home décor store in our town. They came from a company called Brunelli which distributes bedding, quilts, curtains, etc. to various boutiques and shops. I took a quick look at the Brunelli website this morning and if you click around you can find a page that will find the closest retailer to you. The link to the exact curtains I purchased can be found here


I'm so, so happy with them!
 
Since everything is looking so monochromatic I have a few ideas to add a wee bit more colour and contrast into the living room and dining room. Yippee!
 
P.S. I'm thinking of getting another set of the same curtains for the living room to tie the two rooms together. Whaddaya think?
Related Posts Plugin for WordPress, Blogger...

Cozy.Cottage.Cute. All rights reserved © Blog Milk Design - Powered by Blogger